
Sizing
The dimensions for my new Stencil line are 6" by 9" with the designs ending about a half an inch from the border. After much debating, I settled on this size because I often create designs that don't fit into a square. Typically, Cards aren't square. Neither are Tags or Art Journals... I wanted to make the stencils practical for use on those surfaces.With a rectangular shape you can choose the part of the stencil that you want to use on a card size piece. Or, if you are art journaling you can use the whole design to cover a larger area.
Versatility
I enjoy the challenge of making my designs as versatile as possible. Everyone has such a different style when creating so the Stamps and Stencils should be as open to interpretation as possible. As you know, I often design the Stamps in sets. I extend the image by making it different sizes or by flipping it to change the orientation. Smaller images are ideal for pieces like ATCs and Tags and larger images for Cards, Journals or Canvases. You can also mix them all together to create variation.I've taken this same way of thinking and applied it to my Stencils. As you can see below with Maidenhair Fern, I made the design in three separate sizes. You can add to the largest size, use only a portion of it or use the smaller ones separately.


 This piece is by Karin van den Broek using Floral Spirals in the background. She also used Water Droplets 2 and Starfish Set from my Stamp collection. Karin's blog post HERE
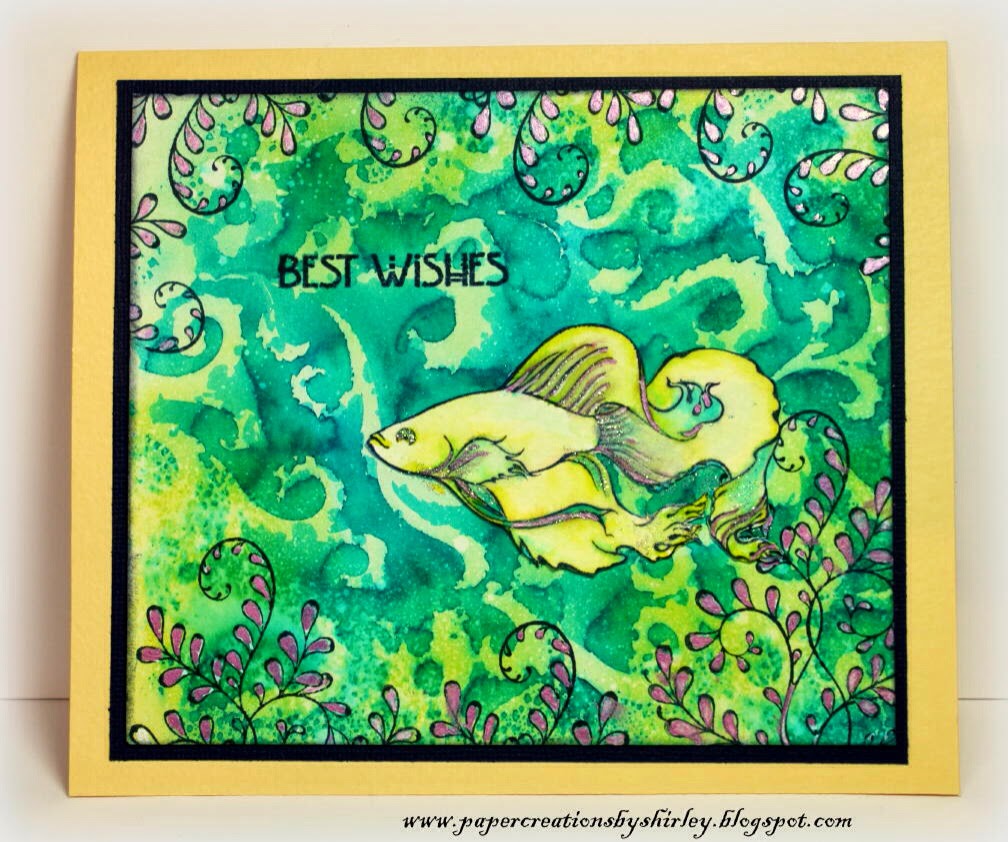
 In this card Shirley Detacher used Floral Spirals as a wave effect in the background with Dylusions Ink Sprays. Stamps used from my collection are Betta and Spiral Branch Set. Shirley's blog post HERE
 I didn't design Floral Spirals to be seaweed but they really do feel like it in Karin's art journal. She also used Rising Bubbles from my Stamp collection. Karin's blog post HERE
 Shirley's subtle use of Floral Spirals using gesso. Stamps used from my collection are African Daisy and Trickling Water Set. Shirley's blog post HERE
 In this piece Wendy McCarthy used Floral Spirals in the background and Lucine from my Stamp collection. Wendy's blog post HERE

 In this card Shirley used Viva molding cream with Floral Spirals. In the foreground sheembossed and cut out Spiral Shell from my Stamp collection. Shirley's blog post HERE
 This is a close up shot from my Art Journal. I used molding paste through Floral Spirals and then lightly dusted it with white paint (using a paintbrush) when it was dry. I was really pleased with how well the ridges of the spirals showed up using the molding paste.
 Lastly, happy me with my new stencils! I posted this one to Facebook already but for those of you who don't use Facebook I thought I'd show it on here too :)
Thank you!
Thank you to everyone for being patient with me through the time it took to create something new. I wanted the stencils to be original and offer everyone something unique. I'm excited to see what you will come up with using these.Expanding beyond stamps feels like a big first step for my business. Thanks so much for sharing this moment with me :)
Bye for now,
Ryn
Congratulations, they look fabulous!
ReplyDeleteGroetjes karin
The stencils look great Ryn...congratulations!
ReplyDeleteYour DT has made lovely examples with the stencils and your stamps combined...
greetings, Alie :-)
Congratulations,they are beautiful stencils. If they are as wonderful as your stamps we are all in for a treat :)
ReplyDeleteHugs
Donna xx
These are beautiful Ryn and will work in lots of different ways. Some gorgeous samples there too. x
ReplyDeleteCongratulations Ryn, I'm so excited for you :) Hugs, Shirleyxx
ReplyDeleteps.. I can say Ryn's stencils are a joy to work with :)
ReplyDeleteThese look really great Ryn, I LOVE using stencils x
ReplyDeleteWonderful idea!!!!
ReplyDeleteJan
Congratulations! They look great :) It does feel like I'm witnessing the development of a small, one person run business evolve into a bigger business - in a few years time you'll have a few persons employed, who will help you on various areas: online community, orders and inventory management etc...
ReplyDeleteI'm enjoying stencils a lot lately, so I'm sure yours will be added to my starting collection soon!
Debbie.
Brilliant stencils Ryn. Good luck with your sales on these - they are lovely.
ReplyDeleteHugs, Sarn xxx
I love stencils....congrats on creating some lovely ones. I especially love the fern one..so unique.
ReplyDeleteThose are real fancy pieces. Nice for you to give us a close look on the layerings and patterns involved in assembling those things. I would love to see you mass produce those at some point, as digital prints and what not, just to see how they will look like. A real good technology is an asset, right? Great job to you. Kudos!
ReplyDeleteFaye Fowler @ Master Copy Print