Welcome!

Welcome to the Designs by Ryn blog! The monthly Customer Creation Challenge can be found above in the navigation menu as well as links to my Shop, Facebook Page and Pinterest. Along the right you will find my Design Team. I hope you enjoy your visit and leave with some inspiration.

Tuesday, June 21, 2016

Hibiscus Birthday Card by BozenA


Hello everyone, 

BozenA here. This will be my last Guest Spotlight for now. I'll miss the motivation to push 
beyond my customary framework. Ryn's products always encourage me to push my 
boundaries by taking risks and seeking other design solutions.
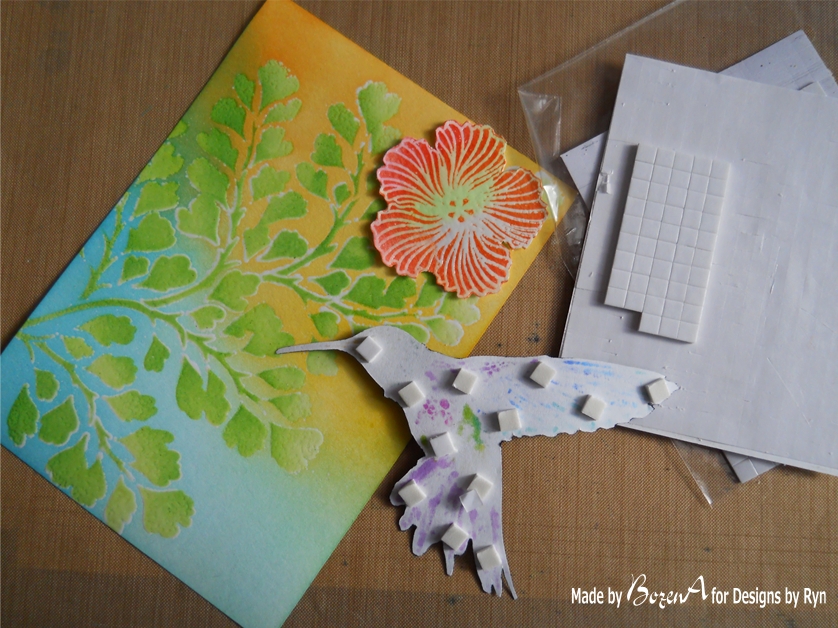
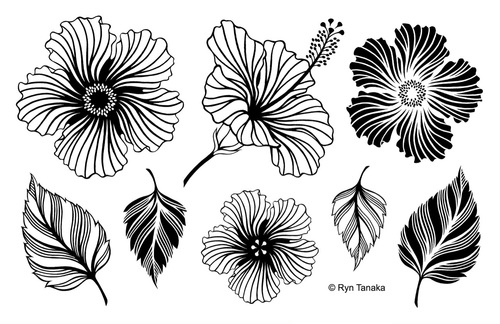
To make this card I used stamps from the Unmounted Stamp Sheet "Hibiscus" and 
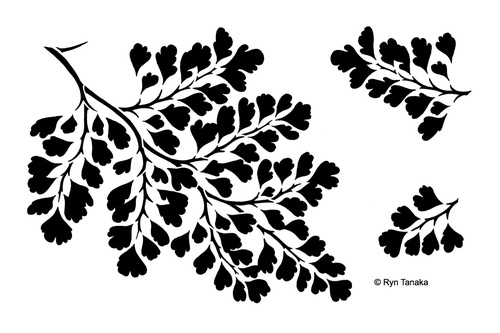
"Maidenhair Fern" Stencil from Designs by Ryn
Hibiscus - Unmounted StampsMaidenhair Fern - Stencil

I also used TCW Mini Cell Theory stencil and chalk Joy!       

To begin, I stamped the Hibiscus flower with black Archival ink. I then masked the flower with a 
piece of paper while I made the background using a TCW stencil and several shades of chalk.
The next step was to make the rest of the background using Maidenhair Fern 
stencil. For this I used green DI in several shades.
I wish I had discovered this technique earlier because the end result is 
simply beautiful.
I then coloured Hibiscus with ProMarkers
The final touch was a birthday sentiment which I embossed with white 
embossing powder over top of a black background. I framed it with orange
paper.
When working with chalk I gently I spray the finished piece with hairspray (as a substitute 
fixative) to avoid the color smearing or rubbing off over time.

I hope that you like my card. It captivated me to make :-) It is fairly easy to do, and if you
have the tools you need it's easy to make your own design. Good luck!

Thank you to everyone for leaving me a comment and for taking the time to look at my post. 
Have a nice day. 
BożenA

Friday, June 10, 2016

Underwater card from Bozena

Hello to all my friends!

Today I would like to introduce my next card made with some great stamps from Ryn Tanaka. I used a set of stamps from Sea Creatures 1 and one stamp from the unmounted sheet Water Effects 1. Here is a photo of all of the tools I used to create the card.
Water Effects 1 - Unmounted stamps  Sea Creatures 1 - Unmounted stamps 
Unfortunately, I do not have step by step photographs of how I made this. Below is a written description of my process.

First, I stamped a panel of watercolor paper (Spiral Shell, Rising Bubbles and Kelp from Sea Creatures 1). I then painted the shell and seaweed with Promarkers. The background and bubbles were painted with blue and gray watercolour crayons. 

The next step was to sharpen the contours. I outlined Kelp with brown Faber Castell pens and the shell using a black fineliner. I highlighted the Rising bubbles with a white marker to sharpen the effect. 

When the panel was dry I added the stencil pattern with chalk around the stamps. 

To finish it off I randomly sprinkled the card with Enameltz (Gold Digger and Molten Metal) and warmed from beneath the paper with an embossing heat gun. As a result, the powder melted in place and created beautiful pearl droplets. 

I framed the card by adhering it onto plum colored cardstock.

This was the first time that I've worked with chalk and I have to say that the effect is cool. It was a bit difficult to apply but it creates a very delicate pattern. I have been fascinated by "painting" with PanPastels for some time but they haven't been available here in Poland. When I found chalk I thought that it might give me a similar effect... Unfortunately, it is very different. The chalk is hard and difficult to transfer a lot of colour to the paper. I settled with a subtle effect in this piece and am happy with the result :)

You can protect the chalk from rubbing off of the surface by gently spraying it with hair spray. I spray firmly from a distance.

Another surprise was the embossing powders Enameltz. When I heated it the powder merged into lumps - like little droplets - giving an interesting effect. It was quite different from the traditional embossing powders that I've used. If you are not using Versamark ink to apply the embossing powder, than it is best to melt it from beneath. This keeps the embossing powder in place.
I love my stamps from Ryn. They provide great possibilities with only the imagination to limit us.I'm happy with how this card turned out and hope you like it as well!
Thank you for your visit and your time. Wishing you a nice day. See you again :-)
BozenA 

Tuesday, June 07, 2016

Guest post from Ellie Knol!

Hi all,

I SO love playing with the stamps from Designs By Ryn, so here I am again, guest designing for Ryn!


Designs by Ryn products used:

 It's really easy to make this; just follow these steps:
1. Adhere pieces of tissue tape to the background-to-be. 
2. Scrape some gesso over the whole surface, not covering the whole of it.
Leave to dry. 
3. Do some stamping in the background (drops). Paint Teykol over it to make sure the drops stay white in step 5. 
4. Use the ferns stencil to add some structure paste to the background; it adds interest to your project. Leave to dry.
5. Color the background with various colors of distress stain, Mist some water to make the colors blend. Leave to dry.
6. For additional color sponge the edges with a distress ink.
7. Clean up the structure paste with a damp cloth.
8. Stamp the flower onto a seperate piece of paper. Color it with a watercolor pencil and cut it out.
9. Assemble the background.

Ellie Knol
Blog: http://elliecreahoekje.blogspot.nl

Monday, May 09, 2016

Guest Spotlight with BozenA

Hey everyone, 

I have another card from BozenA today using my Water Effects stamps. I hope you enjoy :)

Some time ago I prepared few sheets of backgrounds using my Brushos. They produced several nice results and a few less cool panels. For this card I used one of the less cool panels. I was surprised that it turned out so well. No background is important without the other elements.

To begin embellishing the background I reached out for my unique stamps from Ryn. I used Hanging Droplet Set, Trickling Water 2 and  Trickling Water Set 2. I also used a stencil (STAMPlorations Flutterby Stencil) with Inka Gold colors: Gold and Steelblue. I had a great time blending! That's how the subtle pattern of a butterfly came about. It looks his shadow, kind of a spirit... To give him a little personality I glued moving mini eyes. At the end I darkened the edges with Distress inks: sapphire and black.

This card was created spur of the moment so I do not have photographs of it's creation process. I hope the above guidelines will suffice.
In this photo you can see that I used black pen to extend the effect of the Trickling Water designs (the dotted area in the original is shorter). I also added the highlights of each drop with a white Gelly Roll.
Hope you enjoyed my card!
BozenA
https://artcardbox.blogspot.com

Friday, April 08, 2016

A Spring card from Bożena

Hello Everyone, 

Bożena here Guest Designing for Ryn.

This card already went to our friend. Michael is fascinated by nature, especially that which is rare for Europeans. So I thought that hummingbird is the perfect theme for him. There is no more beautiful designs of hummingbirds than those created by Ryn Tanaka. I recently received from a gift stencil Maidenhair Fern  (Ryn, thank you very much, it is great) that I used with the stamp Flying Hummingbird 3 and Hibiscus from Ryn.
First I added Maidenhair Fern stencil on white cardboard using inks DI Mowed Lawn and Twisted Citron
So I could color the background around the leaves, I covered them with a layer of colorless powder embossing
Then I colored the background with inks TO Salty Ocean, Tumbled Glass, Squeezed Lemonade, Spiced Marmalade and Mustard Seed. It turned out that the powder embossing has covered an area a little larger than the fern stencil. It looks as if the edges were painted white.
The next step was to prepare a Hibiscus flower. I stamped it with clear embossing powder, added bloomed ink (DI ripe persimmon), and then I cut out flower with scissors.
I did the same thing when preparing a hummingbird, but this time I use black powder embossing
Then I painted it with Promarkers
Hummingbird got a little sparkle of Inka Gold, and the flower got a touch of Liquid Pearl
The Hibiscus and Hummingbird were then stuck on with adhesive foam to give them a 3D look.
At the end I added a drop of honey-colored glass falling from the beak of the hummingbird
I hope you like my card. If so, I will be grateful if you leave me a comment. Thank you for your time.
BożenA (http://artcardbox.blogspot.com)

Friday, April 01, 2016

Last month's Customer Creation Challenge Winner is...

Hey everyone,

The random winner for last month's Customer Creation Challenge is... Anne from Anne's Papercreations!!! She's made an awesome tutorial HERE showcasing what she made and how she did it. She's included lots of pics showing her process.

Anne's cards below using my Sea Creature and Water Effects stamp designs... You can find them HERE on my website.

Many thanks for popping by! I've posted the April challenge on my blog HERE. Best of luck! I look forward to seeing what comes in this month :)

All my best,

Ryn


April Customer Creation Challenge


Monday, March 21, 2016

Guest Spot with Ellie Knol!


 Guest designing again for Designs By Ryn..I am happy! 
I´ve used a tiny part of a masterboard (I´ve done a tutorial on this here) as the base, and used those similar colors to color Spiral Shell and the Rising Bubbles. I used watercolor pencils to do so.